Hideous Destructor is what happens when someone looks at DOOM’s breakneck pacing, its comical disregard for physics, and its protagonist who runs faster than most cars, and decides to burn it all to the ground. In its place rises something closer to ArmA than anything id Software ever shipped: a tactical realism mod where every fight is dangerous, every wound stacks up, and everything you carry has weight you will feel in your bones.
The mod has a reputation for being impenetrable. It is not. It is deep, yes, but only in a handful of interconnected systems rather than a mountain of disconnected ones. Once you understand how movement, medicine, and ammunition work, everything else falls into place. This guide will walk you through those three systems in detail, then briefly touch on weapons and enemies so you know what you are pointing at and what is pointing back.
Movement and Weight
The first thing you will notice, after the menus, is that your marine moves
like an actual human being. You walk at about five kilometres per hour. With
Always Run toggled on, you jog at a respectable fifteen. Hold Run to
sprint, but do not expect expedited times; you are a soldier carrying gear.
Sprinting causes you to lower your weapon, and the heavier that weapon is, the
longer it takes to bring it back up when you stop. You can sprint for about a
hundred metres before you gas out, after which you need a breather.
Here is where the weight system enters the picture. Everything you pick up adds
to your total encumbrance, shown in the HUD as a bar and a number. Green weight
means you are light, agile, and can leap and dodge with ease. You have plenty
of stamina and can run for a long time. Yellow weight is the sweet spot for
most players: you can still sprint and dodge, you are probably not hurting for
ammunition or medical supplies, and sprinting for cover remains a perfectly
viable option. Red weight is where you have traded speed for firepower and
supplies. You gain almost no extra speed from sprinting. Dodging is limited to
sliding. Long jumps become a problem. If you find yourself wondering why your
marine is crawling along, hold down Use to check your inventory. The seven
rifles and three shotguns you picked up might have something to do with it.
Unload the ammunition you want, then drop the guns you do not need.

Red: your total encumbrance. Orange: your currently equipped weapon. Green: your other weapons, if any. Yellow: all your other stuff.
You toggle between walking and jogging with Toggle Run (which simply toggles
the cl_run variable). Walking is slower, but it has a lower recoil penalty
and a much more stable sight picture. This makes it excellent for
close-quarters work where you need your shots to land exactly where you point
them. Shooting while jogging imposes a noticeable recoil penalty on most
weapons.
Leaning is available through several methods: dedicated left and right lean
binds in the HD control menu, a lean modifier key, or by holding Weapon Zoom
and pressing strafe left or strafe right. All of these work and can be tweaked
to your liking. The lighter you are, the farther you can lean, because you are
not weighed down with so much gear that you cannot take a stable stance farther
from your centre of mass.
Crouching does what you expect: it reduces your profile and lets you duck behind cover. But it also does more. If you are on fire, crouch and spin back and forth to put yourself out. This is as close to stop, drop, and roll as the mod gets, and it is essential to learn because you will be set on fire regularly. Crouching while moving performs a slide or lunge in the direction you are travelling. You can dive forward, fall backward, or lunge side to side, giving you more movement options for avoiding damage than the standard strafe dance.
There is no traditional jumping in Hideous Destructor. Instead, you have
leaping and climbing. To climb, walk up to a ledge, wall, or surface and hold
Jump. If the surface is climbable, your character will pull themselves up.
The heavier you are, the harder climbing becomes, and it is possible to be too
heavy to climb at all. Leaping serves two purposes: dodging attacks in combat
and gaining distance when jumping from a ledge. Approach any downward change
in height, from a single step to a chasm, and you can leap. If you are in red
weight, do not bother trying. Sometimes you can also fumble and lose your
weapon when dropping down from height or climbing.
There is a collision damage system that calculates speed-based impact. Most often this is standard fall damage, but you can also deal damage by slamming into creatures at high speed. This is rarely plan A, but it is good to know when plan A has gone catastrophically wrong and all that remains is physics.
The Medical System
This is the part that drives people away. It looks complicated. It is not as complicated as its reputation suggests, but it is deeper than vanilla DOOM’s “walk over a medikit, number goes up,” and it requires a shift in mindset. In Hideous Destructor, damage is not just a number ticking down. It is a collection of afflictions that compound and cascade, and if you treat them in the wrong order, you die.
When you take a hit, three things happen. First, you lose health, just like normal DOOM. Second, your maximum health limit decreases. Third, if the hit was bad enough, you start bleeding. The bleeding is what kills most new players, because they do not know how to check for it, let alone stop it.
Bleeding
To check if you are bleeding, equip the medikit or bandaging tool (weapon slot 9) and look at the cross on the HUD. If it is bouncing, you are bleeding. The more vigorously it bounces, the more severe the bleeding. You can also look down to see if you are leaving a trail of blood, though this is less precise and is best for simply seeing if you are bleeding at all.
Stopping the bleeding is always your first priority. You will not start to recover health until the bleeding stops, and if you ignore it, you will eventually bleed out, which means incapacitation followed quickly by death. Once the bleeding is stopped, you briefly become stunned and your movement slows, then health regeneration begins, restoring you up to your current maximum health limit.
You have two tools for stopping bleeding: the medikit and bandages. They work differently, and knowing when to use each is the difference between surviving a firefight and bleeding out behind a crate.
The medikit is the primary tool. It uses nanogel compounds that pull flesh
back together and seal wounds. To use it, you must first remove your armour.
(Armour interferes with the applicator. The mod is serious about this.) Then
look down at yourself and hold Fire to begin stitching wounds closed. The gel
stops the bleeding and restores your maximum health value over time, but the
process hurts. You will flinch in pain the entire time the medicine is
rebuilding muscle and tissue. This flinching throws off your aim, so do not
start the process while an imp is rounding the corner.

In order to get the thing that heals you, you need to first open the medikit. It reveals the ‘second flesh applicator’ that is inside, as well as a stimpack and a synthetic blood pack.
The medikit also has a built-in scanner. Hold Weapon Fire Mode while holding
Fire to activate it. Try not to move during the scan, as movement reduces
accuracy, and armour reduces it further. The scanner shows counters for open
bleeding, temporary damage that you will recover from, wounds, and burns. It
does not show aggravated damage, which we will get to in a moment.

Burns are treated differently from wounds. To treat burns with the medikit,
remove your armour, look down, and hold Weapon Zoom while holding Fire.
Take this slowly. Burn treatment causes a spike of pain that deals a small
amount of health damage up front, but it removes a portion of burns instantly
and lets you start healing to your restored maximum health value.
Bandages are the simpler, cruder option. To use them, stand still and hold
Fire until the help text tells you you are done. The advantages are real: you
do not need to remove your armour, the process does not leave you flinching,
and bandages weigh nothing. The downsides are equally real: you cannot move
while bandaging, bandages do not restore your maximum health, and bandages are
not permanent. They hold you together long enough to reach a medikit or finish
the fight, but they will not fix you. You can also use bandages on other
players, which makes them indispensable in co-op.
Damage Types
Beyond simple hitpoint loss, Hideous Destructor tracks three categories of lasting damage that all reduce your maximum health limit.
Wounds are the most common. They are the physical trauma that the medikit’s
nanogel directly addresses. Treat wounds with the medikit’s standard application
(armour off, look down, hold Fire).
Burns come from fire attacks, which are plentiful in this mod. Treat burns
with the medikit’s burn application (armour off, look down, hold Weapon Zoom
and Fire). Burn treatment hurts immediately but works fast.
Aggravated damage is the vague and unhelpful one. The medikit scanner does not measure it. Only two things are known to cause it: balefire from hell knights, barons, and killer barrels, and the catastrophic crash that follows injecting a berserk pack. Since you cannot directly measure aggravated damage, diagnosis is an educated guessing game. If all your wounds and burns are healed, your health is full, and yet you feel more damaged than the medikit scan suggests you are, aggravated damage is the culprit.
Stimpacks
Stimpacks are injectable drugs that provide several small but significant boosts: slowed bleeding, increased health regeneration rate, increased stamina and carry weight, and greatly reduced stun effects from stamina loss or pain. They are a powerful tool and part of an entire playstyle built around pharmacological aggression.
The catch is that you cannot inject them too close together. If you take a second stimpack before the first has cleared your system, your heart explodes. The mod is not subtle about this. Overdosing is instant death. Space your doses and pay attention to your heartbeat monitor.
Blood Level

Blood is tracked separately from health. Any significant injury causes blood loss, and your blood level affects your stamina, which in turn bleeds into several other systems. The bars near your heartbeat monitor indicate your general blood level: the smaller and lower they are, the worse off you are. The medikit scanner can tell you your blood level in numbers. Any blood loss greater than 0.3 units is a bad time, and you will want to find a blood kit to restore yourself.
Incapacitation
When you take enough health damage, you go down. You are near death and probably bleeding. You have barely enough strength to crawl. Recovery from incapacitation follows a specific sequence that you must drill until it becomes routine.
First, stop the bleeding. The medikit is not an option here because the shock and pain of injecting nanogel on your own is too much for your system to handle. You must use bandages, which means you will need to have bandages available at all times. Do not be the marine who dies in a hallway with three medikits in his pack and no bandages.
Once the bleeding stops, healing and stamina recovery can begin. You can sit
and recover naturally, but more often than not, danger is still around. Use
Weapon Fire Mode to cycle through available items. Stimpacks provide a
bit of HP and a boost to stamina recovery, making them the best tool for
getting back up from incapacitation. Berserk serum also works, but the
consequences are severe and we will get to those. Once the shaking stops and
you have enough strength, hit Jump to stand up and dust yourself off.
Armour’s Role in Medicine
Armour is not just damage reduction. It is the buffer that prevents you from entering the medical spiral in the first place. Armour covers your whole body but provides the most protection to your chest, abdomen, and arms. It reduces overall damage taken, lowers bleeding severity, and provides a chance to completely absorb physical attacks, both melee and ballistic. A hit that would kill you outright can be downgraded to a wound you can push through, provided your armour holds.
There are two types. Green garrison armour is light, lasts a long time, and has materials designed to slow the spread of flames across the wearer. It can stop pistol rounds and shotgun pellets if they hit the chest zone. Blue battle armour has a very strong chance to stop almost any physical attack, including rifle rounds, but it is heavy, degrades quickly under sustained fire, and has almost no flame retardant properties. It is all in on physical protection. Choose based on what you expect to face.
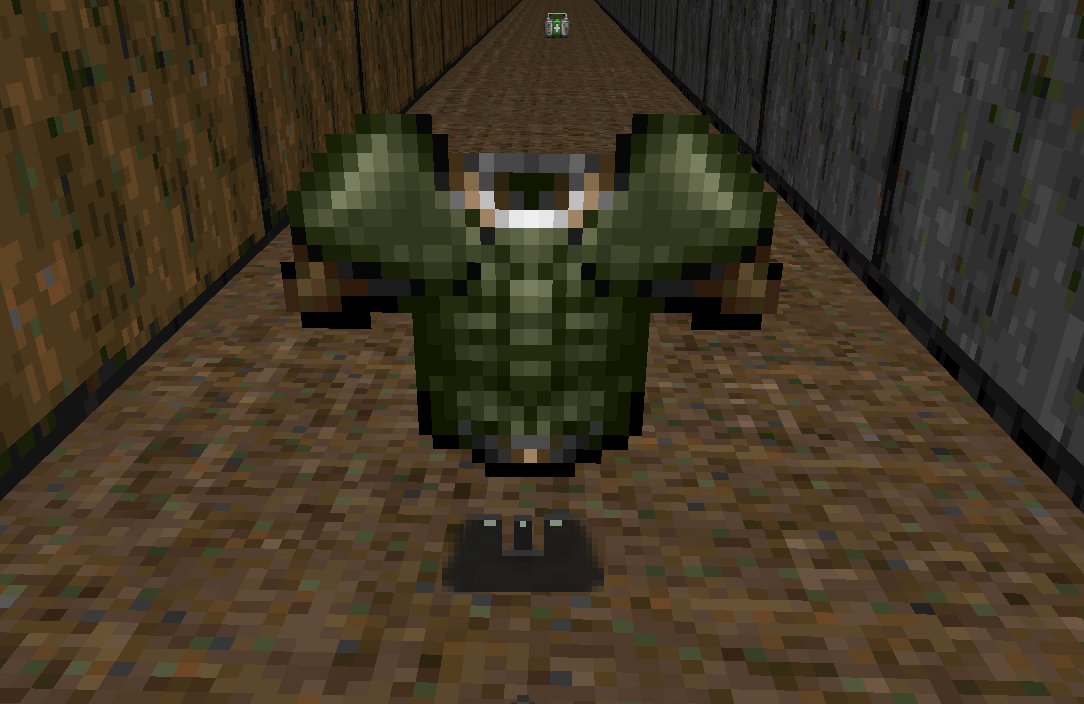
If your armour is destroyed, you can scavenge a replacement from fallen
enemies. Any former human with a helmet is wearing armour. Walk up to their
corpse and hit Use to strip it. Grim, but so is everything else in this mod.
The Mag Manager
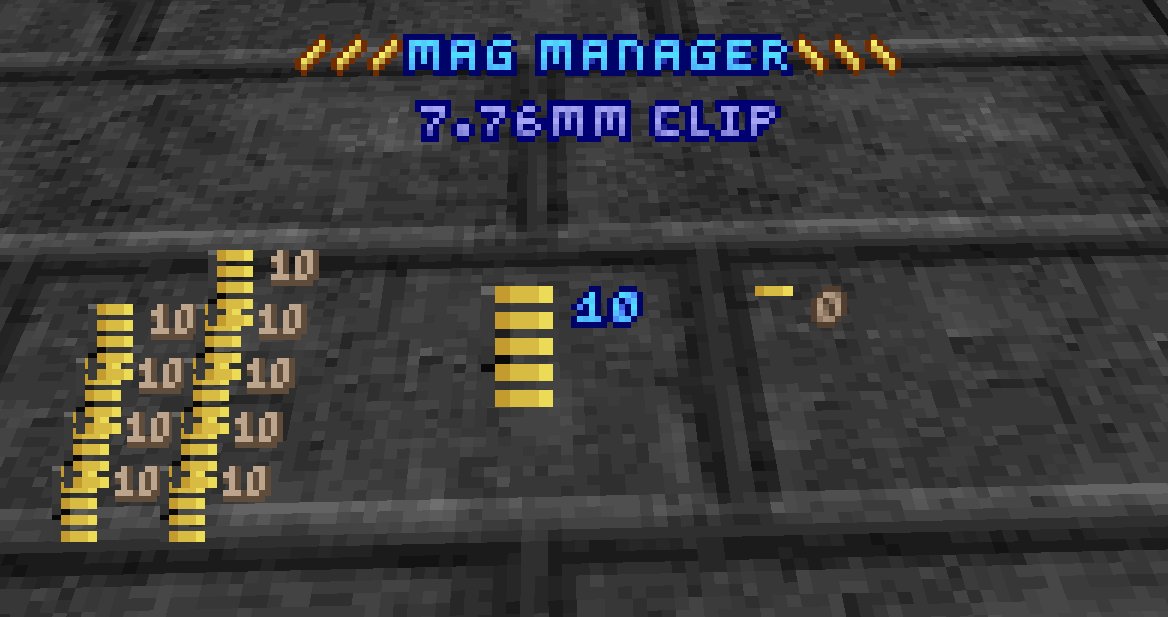
The magazine manager is Hideous Destructor’s answer to a problem that most tactical shooters ignore: bullets do not magically consolidate themselves between firefights. If you have four magazines with three rounds each, you have four magazines with three rounds each. The mag manager lets you fix this.
Hit the Mag Manager key to bring up the interface. It starts with the
ammunition type matching whatever weapon you last had selected. From here, you
can move individual rounds between magazines, consolidating partial loads into
full ones. This is how you scavenge ammunition: after a firefight, walk among
the corpses, strip their weapons of ammunition using Weapon Unload, then use
the mag manager to pack those loose rounds into usable magazines.
You can set the consolidation to automatic, which is what most players do. The automatic setting handles the busywork and lets you focus on not dying. Manual control is available if you have specific needs, such as keeping one magazine partially loaded for a tactical reason that exists in your head and nowhere else.
The mag manager also handles battery management. Batteries power energy weapons and the Vulcanette’s firing motor. The interface lets you adjust passive recharge and consolidation settings for batteries, though in practice you will mostly care about this when using the BFG’s ability to recharge partially spent batteries.
Reloading itself follows natural logic. Tapping Reload drops the old magazine
on the ground and loads a fresh one as fast as possible. Holding Reload
stows the old magazine and then loads a new one. The difference matters when
you are managing a limited pool of magazines and cannot afford to leave them
behind. Unloading works the same way: tap Weapon Unload to drop the magazine,
hold it to keep it.
The ZM66 assault rifle deserves special mention because its magazine system is
uniquely annoying. The weapon fires caseless 4.26mm rounds that are protected
by a legislative patent. If you try to load a used magazine, you must tap
Reload to start the reload process, ignore the legal warning that appears,
then tap Reload again to force the magazine past the ammunition verification
mechanism. If you are packing rounds into a dirty ZM66 magazine by hand, you
must do it slowly. Packing too fast causes the rounds to pop out, which does
not hurt you but is deeply irritating in the middle of a firefight. The
manual’s language around this is worth quoting directly: “Do not hit Weapon
Reload at just the right time as the message comes up. Doing so is illegal.”
The mod’s sense of humour is as dry as its medical system.
Belt-fed and manually loaded weapons each have their own quirks. The Hunter
shotgun loads shells in handfuls; hold the reload key to keep loading until
the tube is full. It also has storage loops on the buttstock that hold twelve
extra shells. After a full reload, hold Reload again to refill these loops
so they are there when you need them. The Slayer super shotgun has side saddles
that work similarly. Weapons that load rounds individually, like the Boss rifle
and the pump shotgun, load more slowly the more injured you are. This is where
the super shotgun’s forgiving reload speed, which stays fast regardless of
health, makes it a popular choice for when things have gone sideways.
When you change maps, the game assumes you consolidate all your ammunition, repair broken equipment, and recharge batteries using the BFG. You can disable this if you prefer to manage everything yourself, but for most players the automatic consolidation is a mercy.
Weapons: A Brief Tour
Hideous Destructor avoids the aim-down-sights mechanic that dominates modern
shooters. Instead, when your weapon is equipped, it is shouldered and in a
state of high ready, with your sight picture fully or partially visible at
all times. This throws off people accustomed to holding a button to aim, but
it becomes reflexive once you settle in. You can brace your weapon against
terrain for additional recoil reduction: crouching braces against the ground,
standing near a vertical surface like a wall or pole and pressing your barrel
against it until you hear a knock gives you the same benefit. Weapon Zoom
forces this bracing when you are near an appropriate surface.
The pistol (Weapon Slot 2) is your trusty backup. It does not collide
with terrain, has the fastest draw speed of any weapon, and deals strong bleed
damage even if the upfront damage is modest. It is also surprisingly effective
against shields. There is a dedicated keybind for drawing it instantly, which
the manual hints you should pay attention to.
The SMG fires the same 9mm round as the pistol but faster, more controllably, and at greater range. It has an integral suppressor and thirty-round magazines. A hell knight with a pistol is a challenge. A hell knight with an SMG is a solved problem.
Shotguns are devastating against unarmoured flesh and useless against shields and body armour. The Hunter holds eight rounds and is a reliable workhorse. The Slayer super shotgun holds only two but fires them simultaneously and reloads quickly regardless of your health level.
The ZM66 assault rifle is the standard infantry weapon of the 32nd century, chambered in 4.26mm caseless. It has high velocity and good stopping power but performs poorly against shields. It jams, it cooks off if you fire too much on full auto, and the magazines are legally encumbered, but it is not a bad gun. If you need to kill something armoured at range, this or the Liberator is your answer.
The Liberator battle rifle fires heavy 7.76mm cased rounds. It kills excessively, melts shields, causes massive bleeding, and its magazines work the way magazines are supposed to. The downside is weight: a loaded Liberator with 120 rounds weighs roughly the same as a loaded ZM66 with over 500 rounds. It also kicks hard when fired unsupported. The bullpup variant fits in a backpack and handles better in close quarters. Both versions can mount a grenade launcher.
The Boss rifle is a manual bolt-action chambered in the same 7.76mm round. It has an adjustable scope, adjustable bullet drop compensation, and a ten-round capacity. The bolt is finicky and jams when debris gets in the action. Cycle the bolt only when necessary and clean it more than once in a while.
The Vulcanette is a six-barrel rotary chain gun with 250 rounds on tap, powered by a battery. It fires at either 700 or 2,100 rounds per minute. It does not jam, but it can feed a bad round. Let go of the trigger, reset, and start squeezing again to clear it.
The rocket launcher holds six rocket grenades and can toggle between grenade mode and high-speed direct fire. Airburst settings let you detonate rockets over cover, which is essential for enemies hiding in foxholes. The grenade launcher (colloquially the “blooper”) is a simpler, lighter alternative that fires the same rocket grenades without the direct-fire option.
The Brontornis is a single-shot 35mm cannon firing armour-piercing incendiary saboted rounds. If it is not a boss, it dies. The bolt passes through multiple enemies and breaks most doors and terrain. It is very light for the damage it outputs, but good luck finding one.
The Thunder Buster direct energy weapon is what happens when you shrink down a spaceship cannon. It causes extreme burning damage and its energy residue leaves arcs of lightning that persist for several seconds. The alternate fire mode splits the beam into a chaotic spray that causes tremendous damage in close combat and fries shields. It is incredibly easy to kill yourself with it.
The BFG requires two charged batteries to fire and needs to be charged itself before it can shoot. It sends out a ball of death that lashes enemies with energy tendrils before exploding with enough force to flip a room. It can also recharge partially spent batteries, which technically gives you infinite ammunition, though the charging process uses the same energy that brings demons back to life. Weigh that risk carefully.
Grenades have a four-second fuze and can be thrown with variable force.
Hold Fire to set the throw strength, Secondary Fire to pull the pin,
and Secondary Fire again to release the spoon and start the timer. You can
“fling” a grenade by turning as you release, giving it extra momentum. The
Weapon Zoom key while holding grenades lets you set tripwire traps.
Melee is not a last resort. Unarmed, you can throw straight jabs, lunging hits that use your speed for extra force, and a shove followed by a heavy swing that is excellent for getting rid of grappling enemies. Striking enemies throws off their aim, and your turning inertia can add torque to the hit, turning a jab into a hook or a lunge into an uppercut. Going hands-free also increases your agility: you can climb higher ledges, brace your impact from falls, and start sprinting instantly. You can also drag objects, items, corpses, and even friends’ corpses.
Enemies: What Wants You Dead
Most enemies in Hideous Destructor are not complicated in themselves, and learning how to fight them is one of the most satisfying parts of playing the mod. This is a sketch, not a dossier.
Imps come in three varieties. Fighters are the small, common ones: waist high, hard to hit, and vicious up close. Mages are the big ones that throw heavy tracking fireballs or scatter bursts that light you up like a match. Healers are the small ones with a medical function that you will learn to hate, because they undo all the killing you have just done. All imps set you on fire; remember to crouch and spin.
Babuins and lost souls bite and latch onto you to deal damage. Lost
souls also set you on fire when they latch. Two ways to knock them off: unarmed
fists followed by Reload for the shoving punch, or bump into a wall for a
good chance to dislodge them.
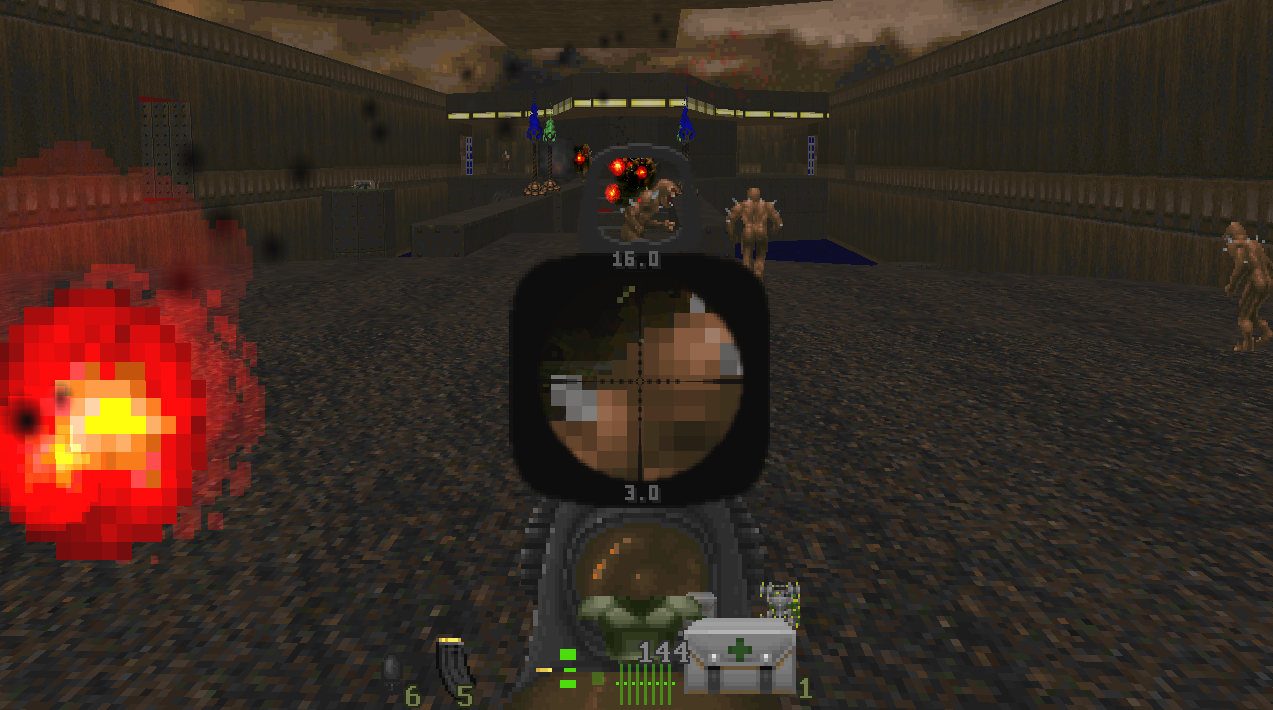
Armoured enemies are any former human wearing a helmet. This includes jackboots, marines, and commandos. Body armour protects the torso and arms; shoot the head or legs instead. Higher-tier enemies and bosses also have shields, those green sparkling barriers that act as a recharging health buffer. You must break the shield to start dealing real damage. When the shield breaks, you will see a large splash of green and hear a distinct noise. Press your attack, because if you wait too long, the shield regenerates. Some demons have enormous shield pools and are best handled with heavy weapons or the bleeding damage from 9mm and SMG fire.
Hell knights have just enough shields to be a serious threat when they rush you. They will frustrate you for a long time, but if you learn to dodge and slide in combat, you might start liking them. Barons are slower but much tankier, with stronger magic and an enormous burst of resurrection energy on death. Start moving quickly after you kill one.
Archviles do not have health in the traditional sense. To kill one, you must hurt it a certain number of times, as if it has lives in an arcade game. This makes vile fights long and extremely dangerous. You need to be aggressive and patient in equal measure. Also watch out for the curse.
The spider mastermind fires 7.76mm rounds at a freakishly fast pace. It will cut through whatever corner you are trying to peek around, and your armour will not stop it, because 7.76mm does not stop for walls.
Robots can be friend or foe. Your own DERP and HERP units are deployable automated gun platforms. Enemy robots will kill you with extreme prejudice. Listen for the sound they make. If you hear it and you know you did not deploy one, you are in trouble.
Closing
Hideous Destructor does not add mountains of new systems. It adds a handful of very deep, very interconnected ones: weight that affects everything from movement speed to climbing ability, a medical system that demands you triage your injuries in the correct order, and ammunition management that treats every round as a physical object. Master these three, and the mod transforms from an exercise in frustration into one of the most satisfying tactical shooters available for any platform.
Bind your keys. The HD control menu contains most of what you need. Check the options menu periodically, because there are many, many ways to tweak the experience to your liking. And when you inevitably die in some stupid, unfair way, remember that the mod is, in its own perverse fashion, being fair. You just have not learnt the rules yet.
Other useful resources
- Hideous Destructor by mc776 on Codeberg, where the mod is developed and maintained.
- “The Ultimate Hideous Destructor Bootcamp” by Fort Of Hard Knox that is arguably the most comprehensive resource on Hideous Destructor available, which is also what made this guide possible and allowed me to get myself acquainted with the game.
- Hideous Destructor’s official manual which covers most of the high-level features, but does not go into much detail. It also outright does not discuss several important mechanics.